Tips on: Using rails for macro shots, specialized flash, macro lens, etc.
by Agustín Uzárraga


This article is intended to illustrate only one of many ways to assemble and combine some accessories to achieve macro photographs, which, as we know, the greater the increase in size and approach, the shallower the depth of field or focus area achieved, for which is now Helicon Focus, which allows us to achieve results that would otherwise be impossible or nearly impossible to accomplish, this is "extending" the area focused on one final image
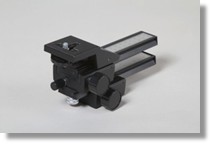
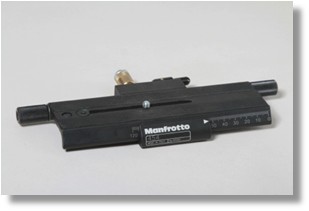
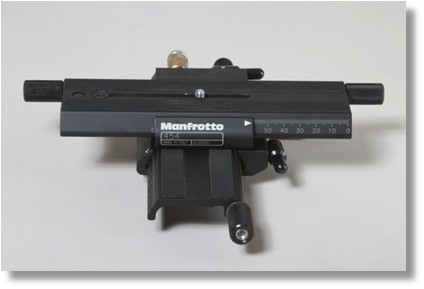
Over the years I have had the opportunity to try different types of macro rails, although the first ones have been economical and function relatively well, I think the best thing to do, is to try to buy the best quality, which have been (by far) for me, the brand Manfrotto Art No. 454, because they are excellent quality (keep the set up steady) without non-required movements and strong enough to support the entire weight of a camera and additional accessories


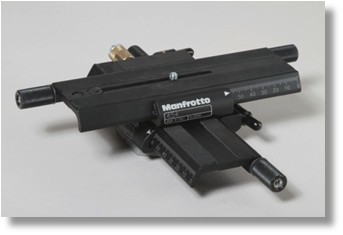
You can use a single macro rail for moving back and forward (for the different points of focus, so, we will NOT change focus in the lens barrel, instead, we will set our lens barrel in one point, like infinity) and we will be taking shots by moving all the set up system in tiny increments from the nearest focus point to the far one.
Is desirable to have an additional macro rail in the horizontal axis movement (left to right) just in case you need to do little movements to re-frame your original composition before start to take the shots.
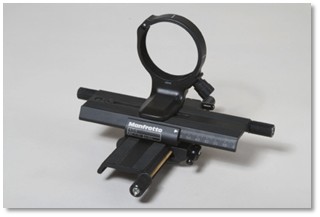
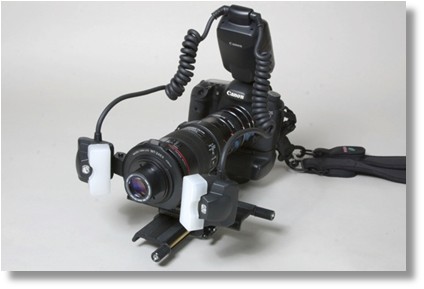
Is a good idea to use a Tripod Collar if its posible, this accesory give to our system much better balance, nearest center of gravity of all the system over the tripod, less movement/vibrations at the time of shooting, easier orientation to frame our next image if we want to go horizontal or vertical in the next shot),also release the camera body connector to be forced with lot of weight.

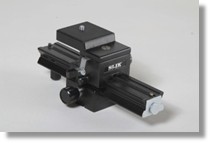
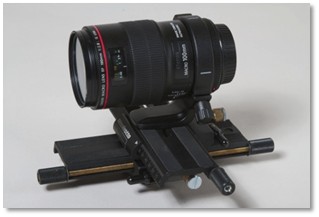
So far, we reach this:
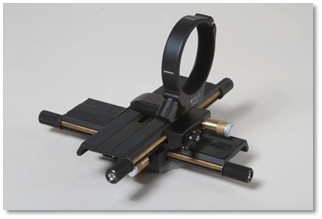

Now insert our lens or combination of lens and extension tubes, close-up lenses, stack lenses, or whatever you want; there are a lot of combinations, limited or expanded by budget, availibility of components or simply by decide what scale do we want to achieve,
althought, as a rule of thumb: the less glass used between the target object and the digital sensor, the better the quality of the image, this means as a general rule, is better to use extension tubes instead of close-up (diopter glass).
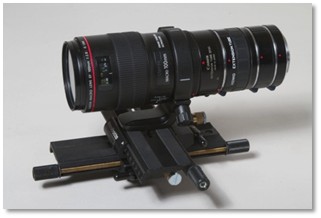
In this set-up:
-93mm of extension tubes (any brand, due no glass in it)
-Canon EF 100mm f/2.8L Macro IS USM Lens
-Raynox Microscopic Lens 24X Model CM-3500
-Vello Tripod Collar (instead of the Canon version four times more expensive) but the same
special size for this Canon lens
-Between lens and Raynox lens, there is the mounting collar of the specialized macro flash
(in the next images)
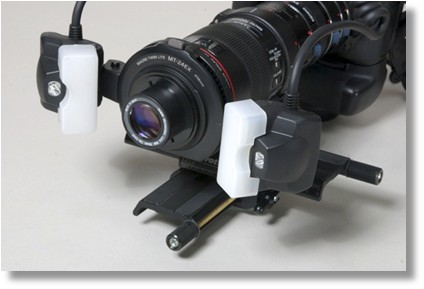
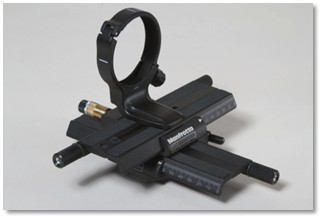
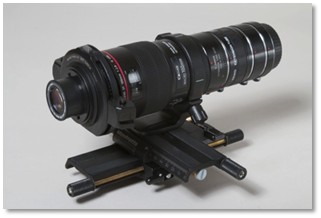
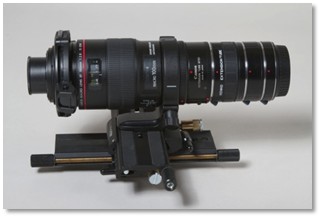
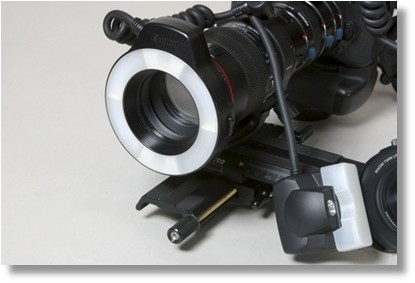
Other macro flash form, is the Macro Ring Flash, wich also give us excellent and beautiful light for macro shots, but less control over direction of it; so, in case you want to obtain different results, in direction and/or more dramatic light the Twin Macro Light will give us a lot more options to achieve it.
Please search for the different positions, options, mount or unmount twin flash heads, mounting or unmounting one or two heads ( Explore for example, to photograph with one head in his collar position and the second twin flash head lighting a flower or a leaf from behind, You will be surprised by the results) There are a lot more posibilities of lighting with twin flash or also more remote controlled flashes in different directions
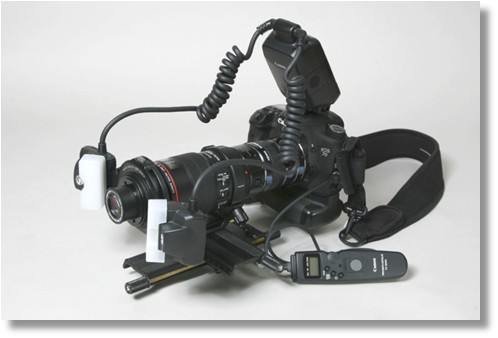
Finally, we can add a remote trigger, wired or wireless, this can give us the freedom to shoot more easily and avoid unwanted movement of the camera. If don't have a remote, always could use the self shooting provision of the camera, but waiting at least the 2 seconds between shots.
Other general considerations could be:
Is always advisable to raise the mirror, before each shot to prevent the vibration that occurs thereby.
Try to get also, an extra or external battery pack for the flash.
I used to set Manual function in camera with E-TTL flash, the top sync flash 1/250 and the aperture at f32 if posible.
Try to shoot only in file format RAW, due to the better dynamic range of this file format, unless your computer can't handle large files.
Course turn off autofocus (in most cases camera can't get right focus) and stabilizer (this can trick the camera), if your lens have this thing, not only You don't gonna use it, also it can ruin your images by tricking the camera.
13 images was used in Helicon Focus to get the final image in this case, practice and personal taste wil tell You how many images You need for each image/combined setup
So, I set focus to infinitum, turn off autofocus and I turned like 1 round the principal measurement screw of the macro focusing rail for each shot, so in this way, You can change the point of focus each time, like 1 millimeter or less, (I recommend to go from front to back to avoid colliding with the target) Once you have your basic images, well, with Helicon Focus is delightful to get the final image, also after that, You can retouch a little with saturation, sharpen or special effects your image, or just leave it right there, its up to You!!
In this particular case I do not use Helicon Remote cause autofocus of the Canon lens plus the Raynox, was causing errors, but if your set system let You use autofocus, its great to use the Hellicon Remote, due to the accurate and constant distances between points achieved by.
As final note, this image was rendered with Method "C", also is better to try the different methods for each set, due to small artifacts sometimes could appear, depending on the target.
Final Image