Improving My Photography, An Inquiry Into Lens Diffraction (Bill Lockhart)
Recently I read a forum thread at Naturescapes about lens diffraction. The thread proved to be the stimulus for an investigation of something that has trouble me for years. Simply stated, “Why do some of my photographs appear better than others?”
Same camera, same lens, but one image is distinctly better than another. There are numerous, probably an infinite number of reasons why this is. For years I thought it is because I was using a tripod in one shot and not another. But, when I am using a good solid tripod for both shots, I still see a difference. Exposure, depth of field, using a remote shutter release, etc. etc. etc. – are all factors that can affect the quality of a photograph. The list goes on and on. It is limitless.
The forum thread discussion at Naturescapes prompted another thought and that thought lead to five intensive days of investigation. I won’t bore you with all the reading I did, but I will reference several websites at the end of this post that you may examine if you are interested.
In sum, after all my reading, and after several discussions with my friend Richard Nowak, a retired engineer with an incredible list of experiences and credentials in photography, embedded microprocessor circuit designs and microchip test solutions in the electronics industry, I discovered that there are two significant factors which make one image better than another. The first is resolution, and the second is the aperture setting for high quality lenses, which Richard points out may include stopping a lens down beyond its diffraction limiting point to correct other more objectionable defects in the lens.
BTW, I still don’t exactly understand what Richard did in his career, but his resume says he did stuff like this: “Circuit designer involved with the acquisition, conditioning, and digitization of analog signals from remote sensors for data logging and computer controlled processes.”
Which takes me back to the subject of lens diffraction, being an optical effect, which limits the resolution of your photograph. An excellent resource about this topic can be found here.
My friend Richard did the math for my camera, the Canon 1Ds Mark II, and advised me that the diffraction limiting of the camera/lens combination is somewhere between f/8 and f/11. In other words, if I shoot with a perfect lens using the camera, an f-stop higher than f/11 will result in a photograph of lesser quality than one taken at say f/5.6 or f/8. A different camera using the same lens could become diffraction limited at a smaller (or larger) aperture than f/11.
As Richard said to me:
“The amount of diffraction increases with decreasing apertures. As sensor resolutions increase beyond a certain point, one is forced to use larger apertures to stay below the diffraction limit of the lens/camera combination. This may be a blow to those who believe more pixels is better as an absolute.
“What you will see is a softer image (loss of detail) due to the diffraction of light through the aperture.
“Since no camera/lens combination will produce a perfectly sharp image, the question is, “How much image softening can we tolerate from diffraction?”
“If you set the aperture larger than where the lens/camera combination becomes diffraction limited, you won’t see it. Why? Because the softness produced by the defects (or the lack of resolution of the sensor) of the image making apparatus is far greater than the softness produced by diffraction alone.”
I am grateful to Richard for interpreting the math for me, frankly I would have never fully understood this whole topic if he had not taken the time to explain it to me in plain English.
The problem with all this is that one normally needs a higher f-stop when doing landscape photography. For example, I have found that I need to shoot at f/16, f/18, or even f/22 to get everything from foreground, to mountain range in the background, in focus. And now Richard tells me that if I shoot at f/18, my images will not be as good as they could be if I shot at f/8. But, I can’t shoot at f/8!
Or can I?
There are two answers. The first is to purchase a tilt lens. Sometimes referred to as a tilt shift lens. Such lenses allow one to tilt the lens downward from the film plane, or upward depending upon the effect one wants to achieve. By tilting a lens downward while the film plane remains level, one is able to use a larger aperture and still keep everything from foreground to distant background in focus. In other words, I can use f/8, a larger lens opening or aperture, instead of f/18 a smaller lens opening or aperture. Of course, this solution can be expensive. A good tilt shift lens costs about $1,500 or so.
The second answer is to take multiple photographs of the same scene and focus each shot on a different spot within the frame and then combine the images using computer software. Some photographers make such composite photographs using Adobe Photoshop and layers. This can be, and is, a tedious process. An excellent article Christina Evans about this process can be found here.
Other software does this without all the fuss. And perhaps the best I have found is Helicon Focus the software varies in cost, depending upon the package one buys, from $30 to $300. A trial version is available and works for 30 days.
I downloaded the trial version and tried it out. WOW. It works!
Here is an example. I took five shots with my Canon Powershot G9 at f/2.8, ISO 80, of my buddy Ralph, who sits on my computer table, and then combined the shots using the HeliconFocus trial version. I won’t show you all five shots, but here are the first and last of the series so you can see the difference in the depth of field between the first and last shot. The first shot was focused on the foot of Ralph, the last on the background, an old brown fleece jacket I own. Notice the dramatic differences in what is in focus and what is not between the two shots. Three other shots were taken at different spots, giving me a good range of images to work with. The result is shown after the two examples.
(First Shot, Focused on Ralph’s Foot)

(Last Shot of Five, Focused on the Upper Right of the Frame)

(Five Shots Combined Using Helicon Focus Software)

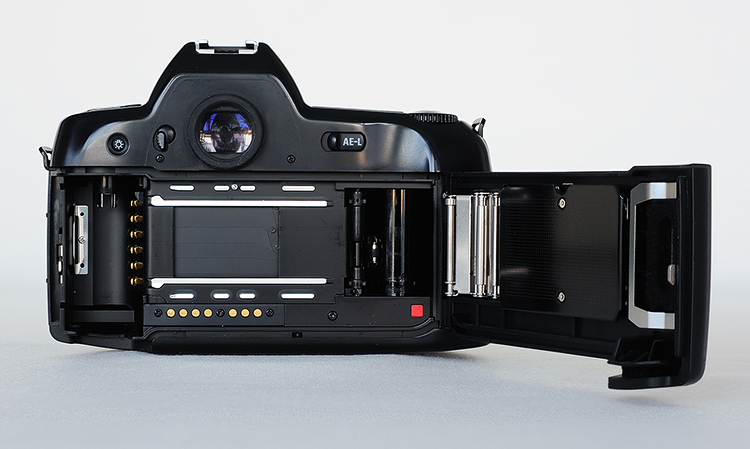
In the meantime, my friend Rich went through the same process. His composite of a Nikon N90s back was made of seven images using the Helicon Focus software.
(Photograph by Richard Nowak Combining Seven Shots)
Well, Richard did a much better job than I did using the software. He is much more patient and methodical than I am.
The next step is to try out this new technique on a landscape scene, something I hope to do in Scotland in late March. I can’t wait. And, in the meantime, I will think about buying a good tilt shift lens, but frankly, why not just buy the Helicon Focus software and save myself about $1,200?
I am very grateful to Richard Nowak for taking the time to explain all this in terms I could understand.
Some resources about this topic can be found at:
Article at Fred Miranda about using a tilt shift lens.
Article at Outback Photo on the same topic.
Article by Christina Evans at Naturescapes about using Adobe Photoshop for combining photographs.
Article at Cambridge In Colour about Lens Diffraction.
M Plonsky’s Website with examples of using this technique.
Charles Krebs’ Website, an outstanding master photographer who uses Helicon Focus for incredible results.
Zork Film and Phototechnique, if you want the best that money can buy when considering a tilt shift lens, this is it.
Author: Bill Lockhart http://www.bill.lockharts.com/blog/2008/02/17/improving-my-photography-an-inquiry-into-lens-diffraction/