Focus Stacking Images
by Russell Brown
I’ve been a professional photographer for around thirty years now and was enamoured with photography even as a child. From even those early days, I was aware of the limitations of Depth of Field.
In macro (or micro) photography particularly, depth of field at such close focusing distances is extremely minimal. The usual method of stopping down the lens to give more, only helps a little and unfortunately adds blurring through lens diffraction, defeating the purpose somewhat.
Happily these days, as with many other areas of photography, digital image processing has come to the rescue. Now, if you have a subject that will remain motionless for long enough to enable you to set up a camera and shoot multiple frames, this limitation of the past can be overcome in a quite dramatic way.
If you do a Google search for “Focus Stacking” or simply look at the Wikipedia page - http://en.wikipedia.org/wiki/Focus_stacking - you will find much useful information and also the various programs available to achieve this technique. The concept is similar to combining multiple frames of different exposures, such as in HDR or Photoshop Extended’s Smart Object image stacking, only affecting focus rather than exposure.
Personally, I have tried a couple of the available Focus Stacking programs and found Helicon Focus the best for me.
If you have the software and would like to try this for yourself, I will give a description of the technique.
To begin with, you will need the right setup. A sturdy tripod is essential. If you shoot indoors, you will need some lighting; preferably at least two sources. I used two flash units. If you have this setup, it is also a good idea to have two more basic, inexpensive tripods, just for the flashes. This will enable you to position them most effectively and safely. Outdoor shooting is possible but you need to be sure that wind doesn’t move the subject at all between frames. Other things to think about are some suitable background material and some arrangement to keep your subject motionless and in place. Clearly, for this type of work, a Macro lens or other close-up accessories, such as extension tubes, are also very helpful.
Once you have everything set, focus on the point of your subject that is closest to the camera and then take a series of images, each focused a little further away until you reach the point furthest from the camera which you want to be sharp. If possible, use a mid-range aperture setting. For most lenses, this will be around f11 or 8. This will give the sharpest result. Also, keep the light quality (direction and amount) constant. The more frames with closer focus spacing you have, the better the result will be. I routinely do around twenty frames for a subject like this. Try not to allow any stray objects in the frame that are outside the range of focus, otherwise they can look rather ugly and distracting in the final image. (Hence my suggestion for background material).
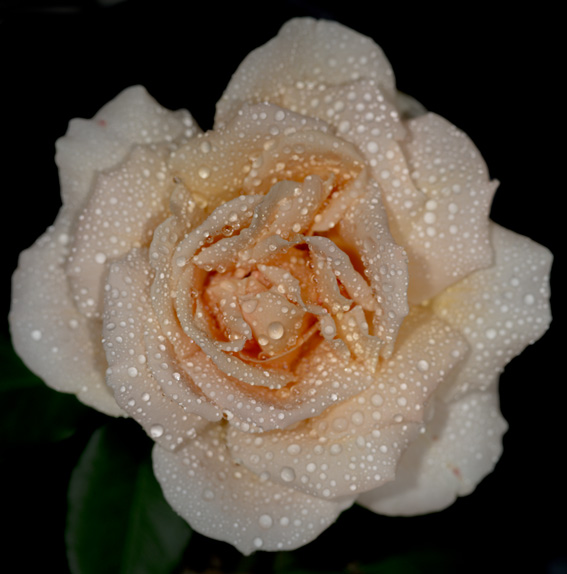
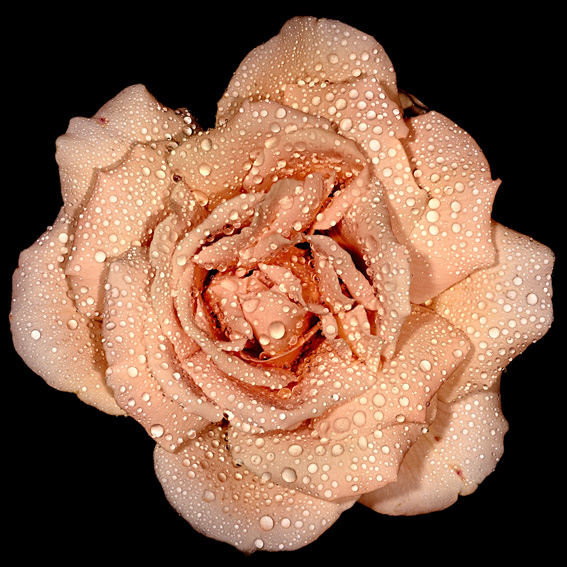
Here are two frames at either end of the focus range:

Once you have captured the images, it is time for the fun part. I shoot Raw files, open them in Adobe Camera Raw, and then resave them as TIF files, which I open into the Helicon software. With the images open, you will need to choose a method, plus radius and smoothing settings. Method defines how the program recognises the transitions between the subjects in each frame. Radius is the size of the area it looks at to find matching features (smaller settings for finer detailed subjects) and smoothing, as the name suggests, smooths the transitions to give a uniform, flawless appearance. These take some experimentation but I find that if you have a good number of images, almost any setting will achieve a good result. You can try one setting, then re-render with another and compare the results directly. The program records the settings you use in the file name, so you can always know what you’ve used with each result. For this type of subject, I generally I use Method B (Depth Map) and Radius and Smoothing of around 4. Of course, there is plenty of documentation available with the software and on the website if you want to learn and experiment more.
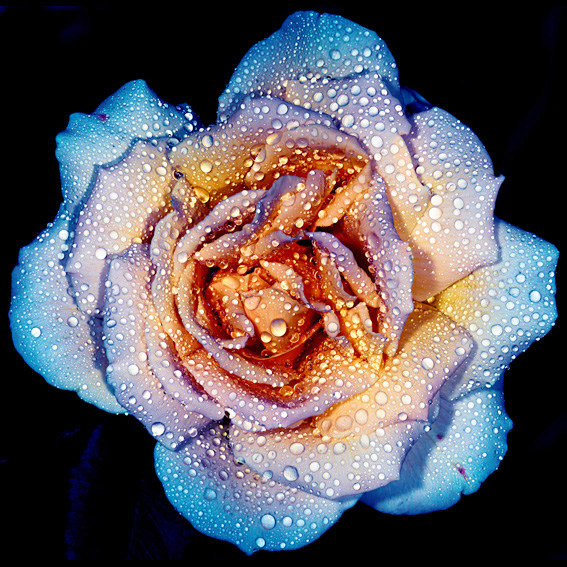
This is the resulting stacked image with some basic contrast/colour correction and sharpening.
Once you have a result you are happy with, check it at higher magnification and if you find any defects, they can often be painted back to the appropriate original frame, using the Retouching tab. When all is finished, click the Saving tab and save your finished file, which you can then reopen in Photoshop for further processing, contrast and colour correction and sharpening. My finished image is at the top of the article.
Helicon Focus also has a neat extra facility, which produces animated 3D versions of your images from the stacked frames. It doesn’t always work perfectly but it can sometimes give really impressive results as a bonus to your regular image.