Resizing and cropping
The Resize filter lets you rotate, crop a part, resize, and change proportions of images. The most common workflow is:
- to rotate if necessary;
- to set proportions (aspect ratio), for example, original or 3:2 or 1:1;
- to draw the selection frame by clicking on the image and dragging the mouse (or by setting the coordinates of the selection);
- to set resizing options, for example, one side should be 600px (the other one calculated according to the proportions), or other example: the image should be downsized to 10% of the original.
Rotation
Angle of rotation slider
If you need to rotate an image just a little bit, use the rotation slider.
Comment: To rotate by 90 or 180 degrees, go to the main menu and select Edit Rotate image (+90) or (-90) or apply the shortcuts (R, L rotate for the current preview only; CTRL + R, CTRL + L rotate the image and save to disk). This can be done on any tab. You can also right click a thumbnail in the image browser to access the command.
 |
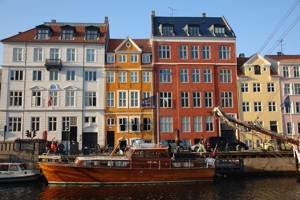 |
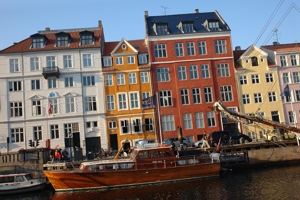
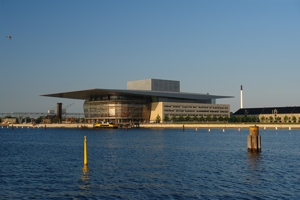
| Original image | Rotation +4,8 applied |
Horizon button
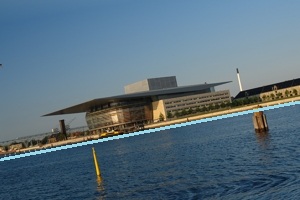
It is just another way to rotate images. Click the button and draw a line on the image which is parallel to the horizon as it is on the image. The program will rotate the image so that this line becomes horizontal.
 |
 |
 |
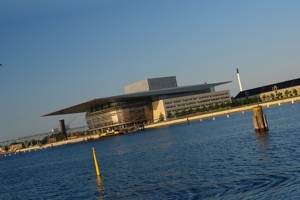
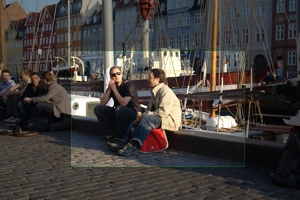
| Original image | The horizontal line | Rotation applied |
Rotation with the help of the "green circle"
When you see the green crop frame on your image then in the corners of the frame you can notice the green circles ![]() . Set the cursor exactly on the circle, click and move the cursor in order to rotate the image.
. Set the cursor exactly on the circle, click and move the cursor in order to rotate the image.
Setting proportions of selection frame
Aspect Ratio
This feature helps to crop a part of an image with specified aspect ratio (proportions). The green frame is automatically set to the selected proportions. Drag the edges of the frame in order to change the area to be cropped. Set the cursor inside the selected area and wait for a second in order to preview the changes - the rest of the image will be darkened.
Click on the arrow next to the icon ![]() and choose one of the predefined aspect ratios:
and choose one of the predefined aspect ratios:
Free - means that you can change the proportions of the crop frame as you like.
Original - means that the frame will have the original proportions, you can only change size and change orientaion (portrait or landscape), see below.
Web - aspect ratios typical for images on the web. If you need another aspect use the User defined option.
Paper - aspect ratios which correspond most common paper sizes. If you need another aspect use the User defined option.
User defined - if you haven't found the needed aspect ratio among the predefined ones, you can define your own ratio. For example, you need a square image. Then you should set the aspect ratio to 1:1.
Setting coordinates of selection frame
Click on the arrow next to the icon ![]() and choose the Change option; the four new controls will appear and you will be able to set the coordianates of the selection. Alternatively you can draw the selection frame with the mouse.
and choose the Change option; the four new controls will appear and you will be able to set the coordianates of the selection. Alternatively you can draw the selection frame with the mouse.
Left size - sets the shift of the crop frame from the left side in pixels.
Top size - sets the shift of the crop frame from the top in pixels.
Width - defines the width of the crop frame in pixels.
Height - defines the height of the cop frame in pixels.
In order to hide the controls, click on the arrow next to the icon ![]() once again and choose Display only.
once again and choose Display only.
Changing orientation - portrait or landscape?
You can change the orientation of the selection frame, for example change 4:3 to 3:4. For this just click and draw the frame of the needed orientation on the image.
Max area
The button sets the crop frame to the size of the original image. If you changed the crop frame, but then decided not to crop, then press this button to restore the frame to its maximum size.
Save and restore the current position and size of the crop frame
You can save the current crop frame's size and position ![]() . Then you can experiment with other sizes and positions, but you can restore the saved one by pressing the restore button
. Then you can experiment with other sizes and positions, but you can restore the saved one by pressing the restore button ![]() .
.
Resizing
Click on the arrow next to the icon ![]() and choose one of the predefined resize options.
and choose one of the predefined resize options.
Crop only - no resizing will be applied.
Dimensions - use this option if you know exactly one of the dimensions in units: pixels, inches, millimeters or cantimeters. If you set one of the dimensions and press ENTER or TAB, the other dimension will be calculated by the program using the aspect ratio of the current crop frame. If you use inches, millimeters or cantimeters you can also set the DPI of the resulting image.
Percents - allows setting in percents the size of the resulting image. Use this feature to downsize images.
Limit large side - allows setting the size of the bigger dimension in pixels. The other dimension will be calculated according to the current aspect ratio.